

Pattern & Copyright Note: Crochet patterns may vary slightly depending on your yarn, hook size, and personal tension. Use the measurements and instructions as a guide, and adjust your tension as needed. This CrochetFloria tutorial, including its instructions, photos, and original content, is protected by copyright. You’re welcome to make the finished project for personal use or as a gift. Please do not copy, republish, or redistribute the pattern or photos. To share it, please link to the original CrochetFloria article.
Affiliate Disclosure: We earn from qualifying purchases made through the affiliate links in this article, at no extra cost to you. We only recommend products that may be useful for your crochet projects.
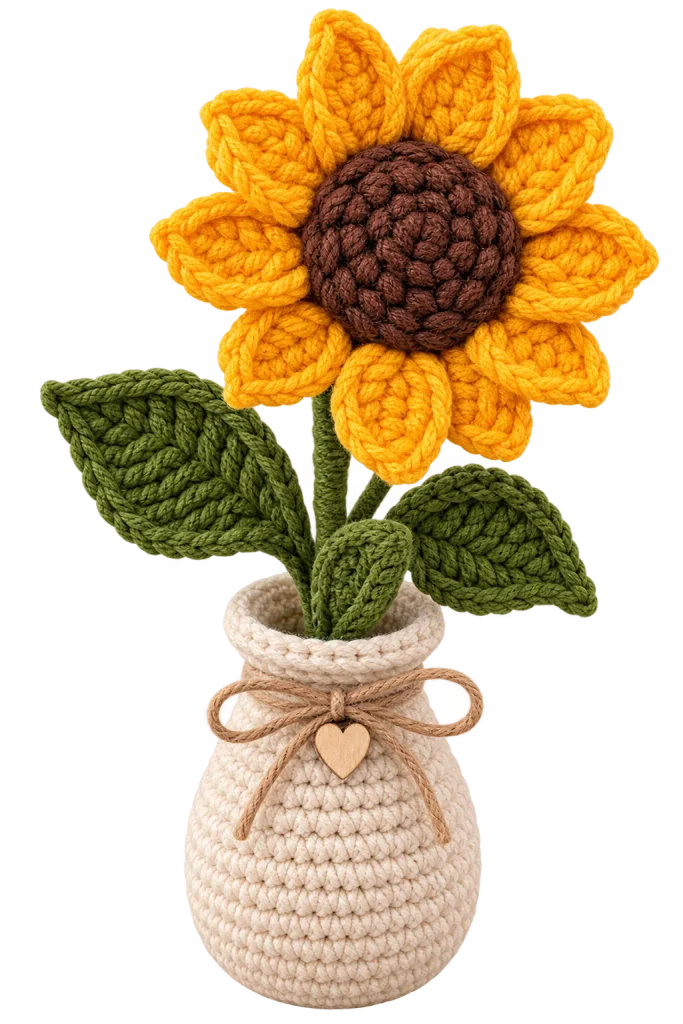
There’s something about a crochet sunflower that photographs beautifully no matter where you put it, tucked into a mason jar on a windowsill, sitting in a woven basket by the front door, or clipped onto the strap of a canvas tote. Unlike a lot of crochet flowers, sunflowers don’t need to be perfectly symmetrical to look right. A little unevenness in the petals actually makes them feel more like the real thing.
This guide walks through how a crochet sunflower is built, piece by piece: center, petals, leaves, stem, and assembly, along with the shaping tricks that give it that soft, sun-facing curve. You’ll also find ways to size it up or down, style variations to try once you’ve made your first one, and troubleshooting for the most common hiccups (curling petals, a flat-looking center, a floppy stem that won’t stand up).
Because exact stitch counts and row-by-row instructions vary depending on the yarn and hook you use, this article focuses on the construction logic, what happens in what order and why, rather than a single rigid pattern. That approach also makes it much easier to adapt the flower to whatever size or style you’re going for.
Before starting, we’ve got some other related Crochet articles, Take a Look:
- 10 Halloween Crochet Ideas for a Spooky Handmade Home
- 10 Halloween Crochet Decorations to Make This Fall
- 10 Crochet Pumpkin Ideas for Halloween and Fall
- How to Crochet a Rose: Easy Step-by-Step Flower Tutorial
Save This on Pinterest!
No time to read this Crochet a Sunflower? Click on the save button and pin it for later!
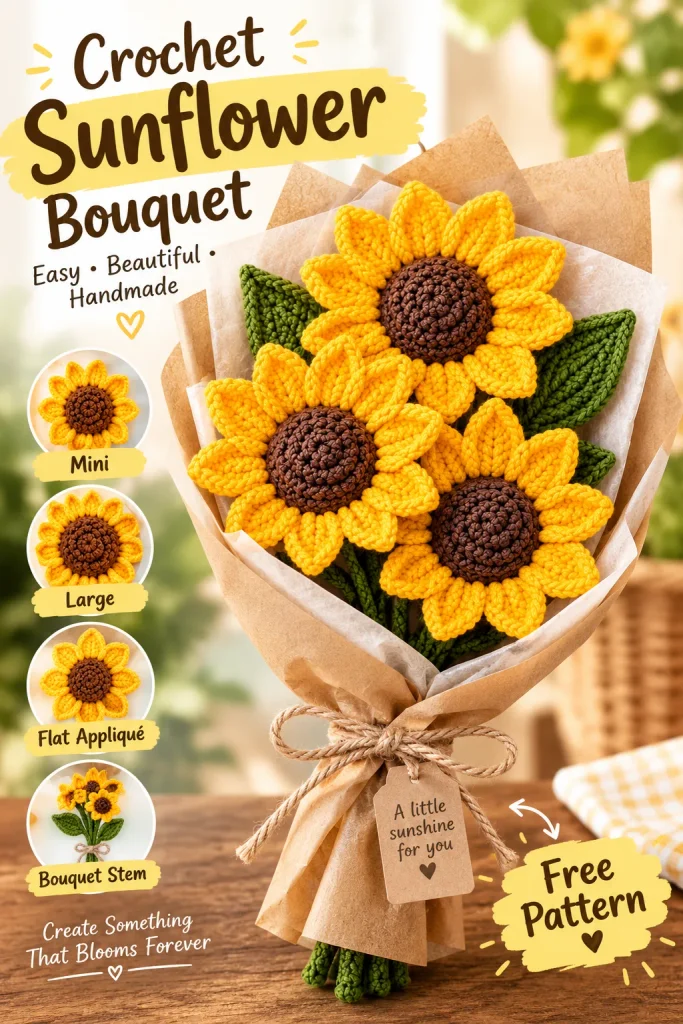
Quick Answer: Crochet Sunflower at a Glance
| Detail | Typical Range |
| Skill level | Beginner-friendly with some intermediate techniques (petals, layering) |
| Finished size | Roughly 3–5 inches across for a standard flower; smaller or larger with different yarn/hook |
| Estimated time | About 1–2 hours for the flower head; longer with leaves, stem, and stuffing |
| Yarn weight | Worsted weight (medium, US #4) is the most common choice; DK or chunky yarn also work |
| Hook size | Generally a hook sized to match your yarn label, often in the 4–5.5 mm range |
| Colors | Golden yellow or orange-yellow petals, brown or dark chocolate center, green leaves and stem |
| Number of petals | Commonly 12–16, though this varies by pattern and desired fullness |
| Stem | Optional. The flower head works well on its own or attached to a stem |
Treat these as general starting points rather than fixed numbers. Your actual gauge, yarn, and hook will shift the finished size and petal count.
What You’ll Need to Crochet a Sunflower
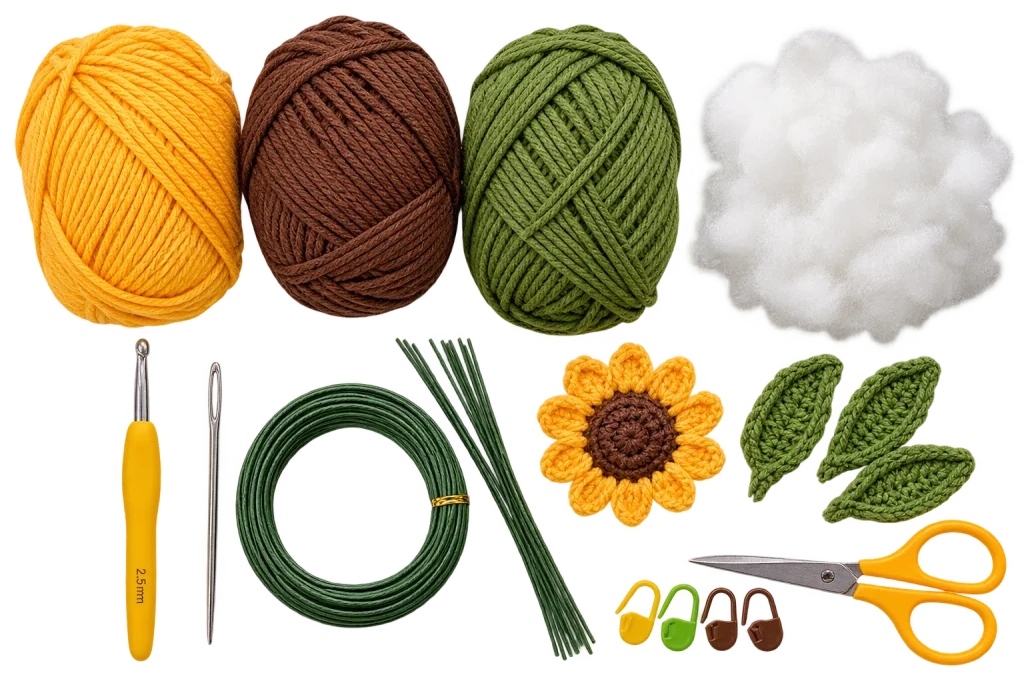
Before you start, gather your materials so you’re not stopping mid-project to search for a stitch marker.
Yarn
- Golden yellow or orange-yellow for the petals
- Brown or dark brown for the center
- Green for the leaves and stem (if making one)
Tools
- Crochet hook sized to your yarn weight
- Yarn needle (for weaving in ends and sewing pieces together)
- Scissors
- Stitch marker (to track the beginning of rounds, especially useful for the center)
Optional but helpful
- Polyester stuffing (for a slightly domed, more three-dimensional center)
- Floral wire (for a stem that holds its shape and can be bent)
- Floral tape (to wrap a wire stem cleanly)
- A wooden skewer or floral stick (as an alternative to wire for a straight, sturdy stem)
- Fabric glue or a hot glue gun (for attaching a brooch pin or hair clip finding, if making an accessory)
Crochet Supplies Quick Links
Explore useful supplies and tools for your crochet projects. These shopping links make it easier to find materials and accessories for your next handmade creation
- Cotton Yarn – Find cotton yarn in different colors for your flower.
- Cotton 8 Yarn – Browse yarn options for small crochet projects.
- Crochet Hooks – Find the right hook for your crochet work.
- Floral Wire – Useful for shaping petals and making flower stems.
- Green Florist Tape – Wrap and finish your crochet flower stems.
- Shop LoveCrafts – Discover more yarn and craft supplies.
Crochet Abbreviations Used in This Article
This guide uses US crochet terminology. If you’re used to UK terms, remember that a US single crochet (sc) is a UK double crochet (dc), and so on; the stitch names shift by one “level.”
| Abbreviation | Meaning |
| ch | chain |
| sc | single crochet |
| hdc | half double crochet |
| dc | double crochet |
| sl st | slip stitch |
| st(s) | stitch(es) |
| rnd | round |
| rep | repeat |
| inc | increase |
| dec | decrease |
| MR | magic ring |
If you’re newer to crochet, it’s worth practicing a magic ring and a basic increase round before starting the sunflower center, since both come up right away.
Before You Start
A few decisions upfront will save you from redoing sections later.
Yarn choice matters more than it seems. A smoother, plied yarn (like a standard acrylic or cotton-acrylic blend) gives crisp, defined petals. A fuzzier or more textured yarn can blur the petal edges, which sometimes works beautifully for a softer, “meadow” look but isn’t ideal if you want a crisp, graphic sunflower shape.
Match your hook to your yarn, then adjust for tension. If your stitches look loose and gappy, try going down half a hook size. If your fabric feels stiff and hard to work into, size up. Sunflower centers especially benefit from a slightly tighter tension, since a loose center can look flat instead of domed.
Learn to count your stitches as you go. Because much of a crochet sunflower is worked in continuous rounds, it’s easy to lose track of where a round starts. A stitch marker moved up after every round removes the guesswork.
Decide early: flat or stemmed? A flat sunflower (no stem, sewn flat on the back) works well for appliqués, coasters, or pieces sewn onto other projects. A stemmed sunflower stands upright in a vase or arrangement. This decision affects how you finish the back of the flower, so it’s easier to plan for it before you start than to convert one style to the other afterward.
Crochet Sunflower Size and Skill Level
A crochet sunflower sits comfortably in beginner-to-intermediate territory. The individual techniques- working in the round, single and double crochet, basic increases- are all beginner-level. What pushes it slightly past “absolute beginner” is petal shaping: getting petals to sit evenly around the center, with consistent length and spacing, takes a little practice.
If it’s your first flower project, expect your first sunflower to look a little different from your second or third. That’s normal, and it’s part of why handmade sunflowers have so much natural charm: no two look machine-identical.
Want to keep the pattern handy while you crochet? You can download the free printable PDF version below. It includes the pattern instructions in an easy-to-follow format so you can save it and use it whenever you want.
[Download the Free Crochet Flower Pattern PDF]
How the Sunflower Comes Together
Before diving into each part, it helps to see the whole build at a glance:
- Center, worked first, in brown or dark yellow, usually flat or slightly domed.
- Petals, worked either directly onto the center or as a separate ring attached behind it.
- Leaves, worked separately in green, usually two to four per flower.
- Stem, crocheted as a tube or chain, with or without wire support.
- Assembly, center attached to petals, leaves and stem joined together
- Shaping, blocking, steaming, or hand-shaping the petals into their final curve
Working in this order means you always have a finished center to check your petal spacing against, rather than guessing how many petals will fit.
How to Crochet the Sunflower Center
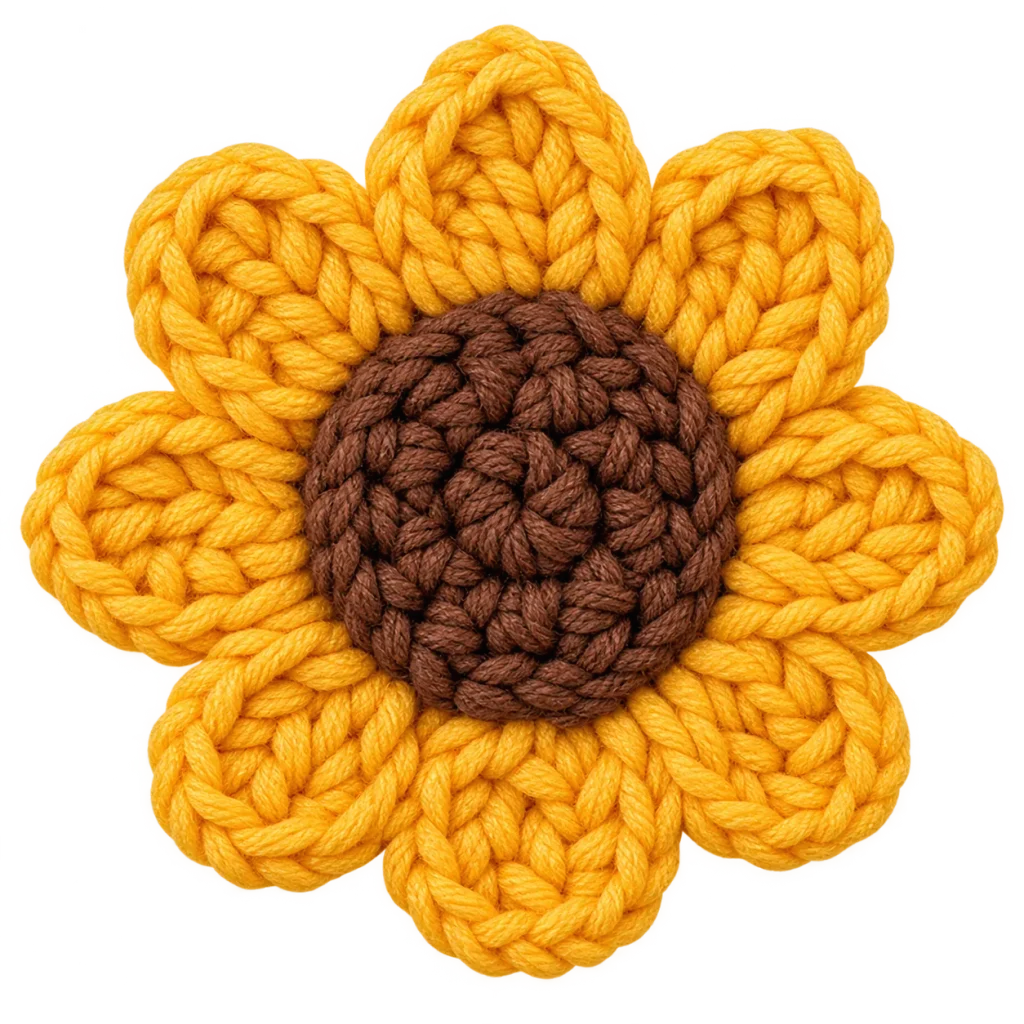
The center is what gives a sunflower its identity. Without the dark, textured middle, it just looks like a yellow flower. Here’s how it typically comes together:
Start with a magic ring in your brown or dark yellow yarn. Work an initial round of single crochet stitches into the ring, then pull it closed. From there, work increase rounds, adding extra stitches evenly spaced around the round, until the circle reaches the width you want for your center. A wider center means a fuller-looking sunflower relative to its petals; a smaller center makes the petals more prominent.
Once the circle is the right size, you have two options:
- Flat center: work one or two rounds without increasing, then finish off. This gives you a flat disc to sew or attach petals to.
- Domed center: switch to working in a spiral without increasing, and lightly stuff as you close the round. This creates a gentle three-dimensional bump that catches light nicely and reads as more realistic in photos.
For added texture, many crocheters work a round of single crochet through the back loops only near the center of the circle, which creates subtle ridged detail similar to real sunflower seed heads. This is optional, but it’s one of the easiest ways to add realism without changing your stitch count.
How to Crochet the Sunflower Petals
Petals can be worked two main ways: directly into the outer round of the center, or as a separate round of stitches attached behind the finished center afterward.
Working petals directly onto the center keeps the flower as a single piece with no sewing required. Each petal is typically built from a small group of stitches worked into one stitch of the center’s outer round, shaped with a chain or a rise-and-fall combination of stitches (starting low, building up to double or treble crochet in the middle of the petal, then tapering back down) to create a pointed or leaf-like shape.
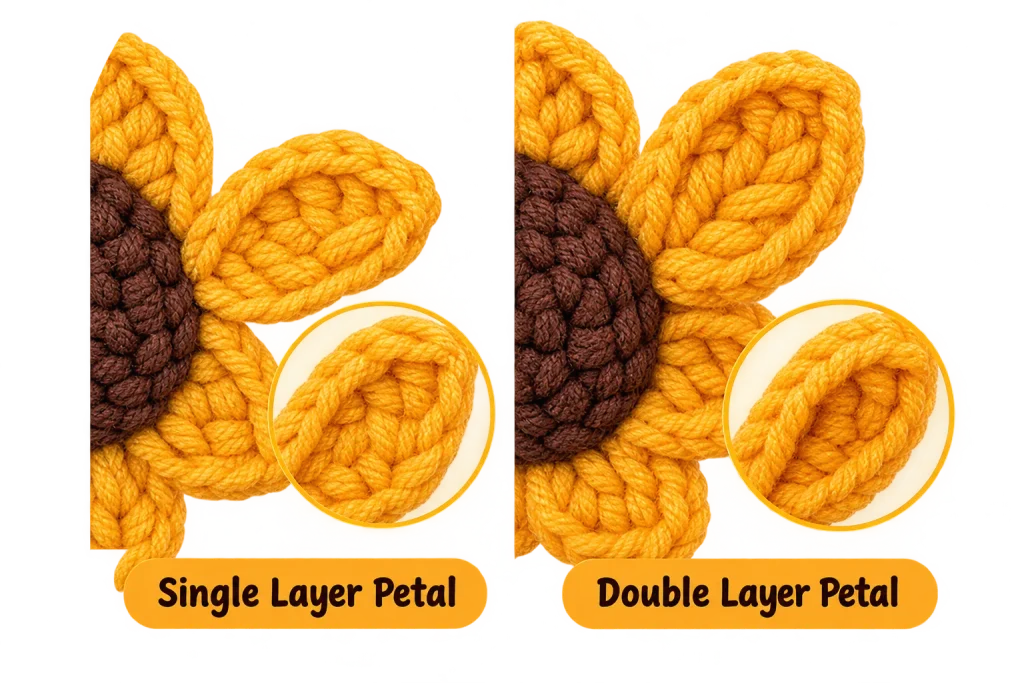
Working a separate petal layer means crocheting a ring of petals as its own piece, then stitching the center on top. This method makes it easier to add a second layer of petals behind the first for extra fullness: simply crochet two petal rounds instead of one, offset them slightly so the back layer peeks out between the front petals, and layer them before attaching the center.
A few things to keep in mind for petal shape:
- Spacing: petals worked too close together will overlap and cup upward; too far apart and gaps show around the center. Even spacing around the center’s stitch count keeps petals looking balanced.
- Length: longer petals give a dramatic, open look; shorter petals keep the flower compact and tidy, which works well for mini sunflowers or accessories.
- Pointed tips: ending each petal with a couple of stitches worked together (a decrease) creates a defined point rather than a rounded, blunt tip, closer to how real sunflower petals taper.
- Second layers: if you want extra fullness, a second row of shorter petals behind the main layer adds depth without making the flower feel bulky.
How to Make the Sunflower Leaves and Stem
Leaves are usually worked flat, starting with a chain and building rows or rounds that taper to a point at each end, giving the classic pointed-oval leaf shape. Two to four leaves per flower is typical, fewer for a minimalist look, more if the leaves are meant to fill out a bouquet arrangement. A row of single crochet worked around the leaf’s edge after the main shape is complete gives it a cleaner outline and a bit more structure.
Stems come in two main styles:
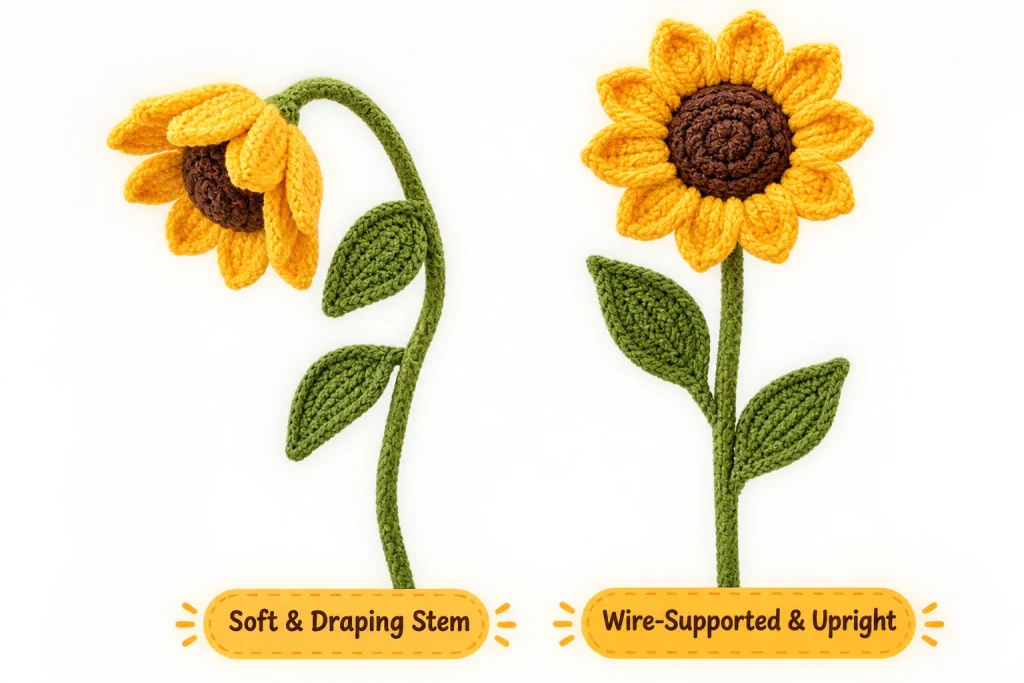
- Soft stem: a simple crocheted tube or chain, sometimes stuffed lightly. This drapes rather than stands, which works well if the flower will lean against something (a vase edge, a wreath base) rather than stand freely.
- Wire-supported stem: floral wire inserted into a crocheted tube (or wrapped in floral tape and covered with a crocheted casing) lets the stem hold a pose, a gentle bend, a specific height, or an upright stance in a bouquet. This is the better choice if you want the sunflower to stand on its own in a vase without support from other stems.
If you’re using wire, insert it as you go rather than trying to feed it through a finished tube. It’s much easier to control, and you can bend the stem into its final shape before the yarn casing is fully closed at the top.
How to Assemble the Crochet Sunflower
With all the pieces made, assembly is mostly about placement:
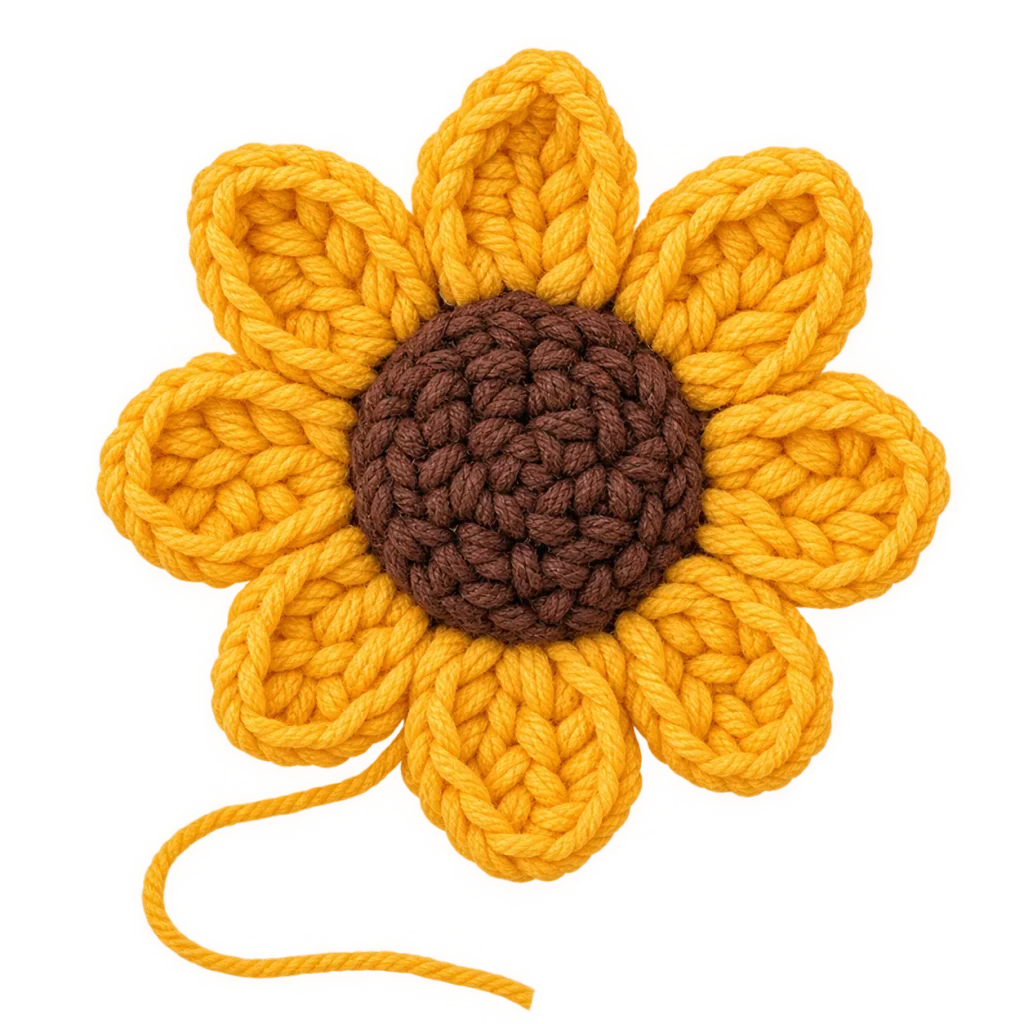
- Attach the center to the petals using a yarn needle and matching thread, stitching around the outer edge of the center so it sits flush against the petal layer without puckering.
- Attach leaves either directly to the stem (spaced a short distance below the flower head) or to the back of the flower itself, depending on the style you’re going for.
- Attach the stem to the back center of the flower, stitching securely around the point of contact. This is the joint that takes the most stress if the flower gets handled, so a few extra stitches here go a long way.
- Weave in all loose ends last, once you’re sure the placement looks right, since ends are much easier to adjust before they’re woven in.
Lay the assembled flower flat and check it from above before calling it finished. Asymmetry is easiest to spot from directly overhead.
How to Shape Crochet Sunflower Petals
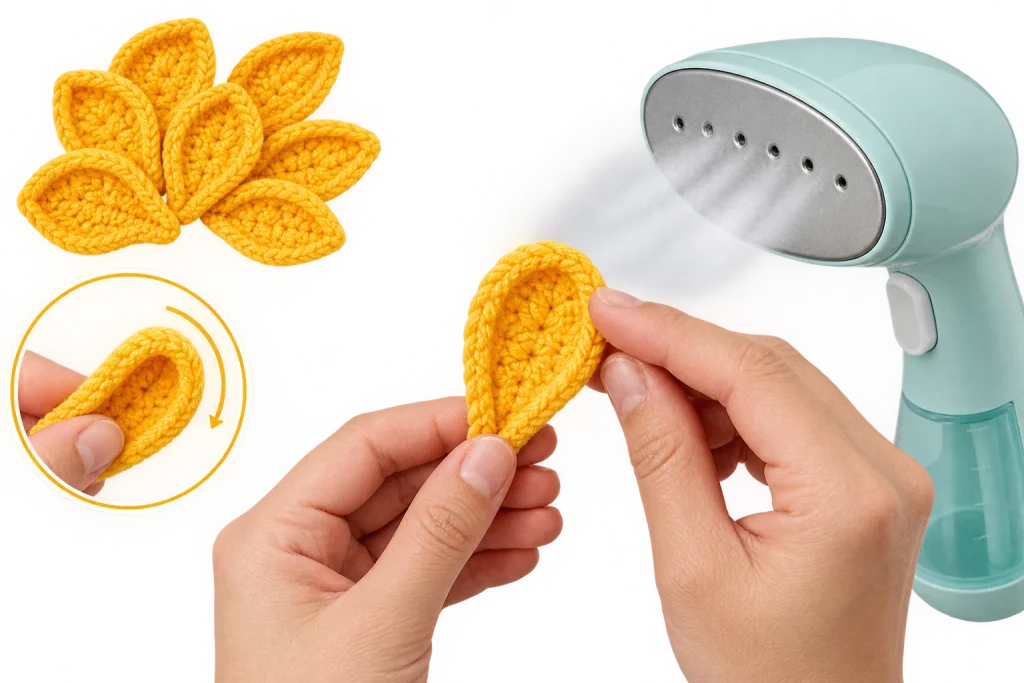
Freshly finished petals often sit a little flat or curl inward, especially with acrylic yarn. A few gentle shaping methods fix this without damaging the fibers:
- Steam blocking: hold a steamer or the steam from an iron (without touching the fabric directly) a few inches above the petals, then use your fingers to curve each one outward and slightly downward while the fibers are warm and pliable. Let them cool completely before moving the flower, so the shape sets.
- Wet blocking: lightly mist the petals with water, shape them by hand, and let them air dry flat or propped in the position you want.
- Hand shaping only: for animal-fiber or blended yarns that don’t respond well to heat, simply working the petals between your fingers repeatedly, curving them outward, can train the fibers over time without steam.
For a natural, sun-facing look, curve the tips of the petals slightly downward and outward rather than leaving them straight. Real sunflower petals rarely point straight out from the center. Avoid pressing a hot iron directly onto acrylic yarn, since it can flatten or melt the fibers instead of just relaxing them.
How to Resize Your Crochet Sunflower
Once you’re comfortable with the basic construction, adjusting the size is mostly a matter of scaling a few variables together rather than changing the whole method:
- Yarn weight: switching from worsted to DK or fingering weight yarn shrinks the whole flower proportionally; moving up to chunky or super bulky yarn scales it up.
- Hook size: a smaller hook with the same yarn tightens the stitches and produces a smaller, denser flower; a larger hook loosens things up for a bigger, airier one.
- Center size: fewer increase rounds keep the center small and delicate; a few extra rounds create a bolder, more substantial middle.
- Petal dimensions: shorter, narrower petals suit mini sunflowers (good for garlands or brooches); longer, wider petals suit statement pieces for a mantel or large arrangement.
Because exact stitch counts shift with every yarn and hook combination, it’s best to treat resizing as a gradual experiment. Make one small change at a time and see how it affects the finished flower before combining several changes at once.
How to Make Different Crochet Sunflower Styles
Once the basic construction feels familiar, there’s a lot of room to vary the finished look:
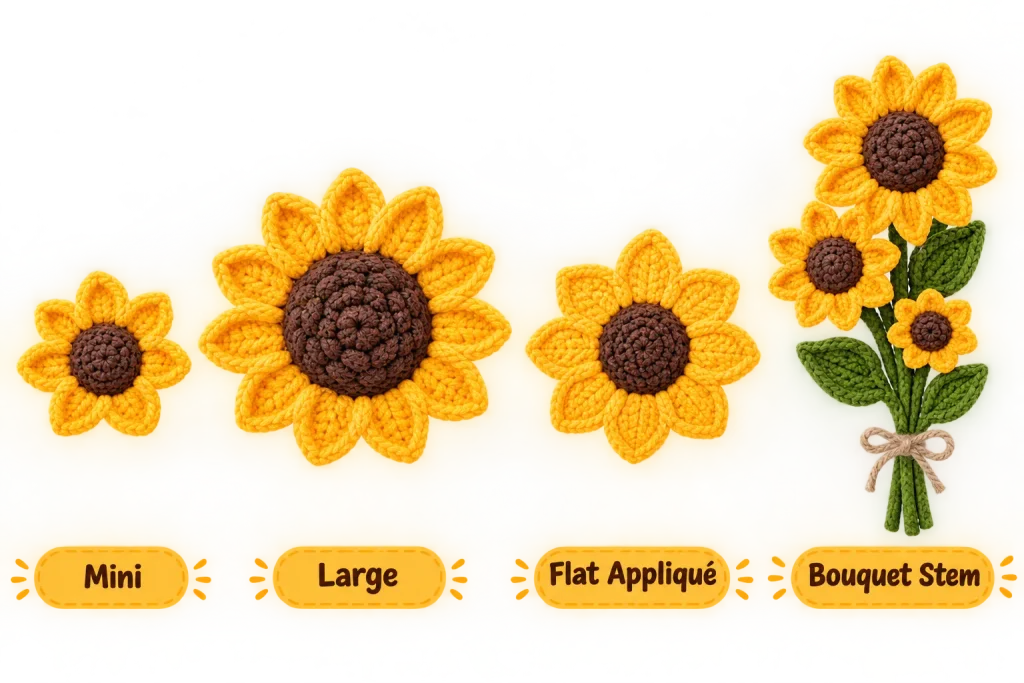
Mini sunflowers use finer yarn and a smaller hook, with shorter petals and a smaller center. These are ideal for garlands, jewelry, or scattering several across a table setting.
Large sunflowers use chunky yarn and a bigger hook, with a substantial center and long, dramatic petals. A single large sunflower can act as a standalone centerpiece rather than part of a grouping.
Flat appliqués skip the stem entirely and are finished flat on the back, ready to sew onto bags, pillows, headbands, or clothing.
Double-layer flowers use two offset rounds of petals for extra fullness and a more layered, dimensional silhouette, well suited to photography since the depth catches light and shadow.
Rustic sunflowers lean into imperfection: slightly uneven petal spacing, a heathered or textured brown for the center, and a soft, undyed-looking green for the leaves. This style fits farmhouse or cottagecore styling especially well.
Bouquet flowers are typically made with wire stems at a consistent height across several flowers, so they sit evenly together in a vase or wrapped bouquet.
Easy Ways to Use Crochet Sunflowers for Home Decor
A finished sunflower doesn’t have to stay a single flower on its own. Here’s where it can go:
- In a vase or jar, either alone or mixed with other crochet flowers, for a low-maintenance version of a cut-flower arrangement that never wilts.
- As part of a wreath, attached around a grapevine or foam base along with leaves and smaller filler flowers.
- In a garland, with several mini sunflowers strung or sewn along a length of twine or ribbon for a mantel, doorway, or party backdrop.
- As a table centerpiece, arranged in a low bowl or basket, especially effective in late summer and early fall table settings.
- Tucked into a woven basket on a shelf or entryway table, paired with other neutral textures like linen or wood.
- Sewn onto a throw pillow as a single accent flower or a small cluster in one corner.
- Displayed on open shelving, propped in a small bud vase alongside books or plants, where the texture stands out against smoother surfaces.
- As a seasonal swap, brought out for late summer and fall and stored the rest of the year, since it never wilts, it can be reused for years.
Crochet Sunflower Gift Ideas
Handmade sunflowers make a gift feel personal without requiring an occasion to justify it:
- Mother’s Day or birthday bouquet: a small bunch of stemmed sunflowers wrapped in kraft paper or tied with ribbon.
- Housewarming gift, paired with a small vase, ready to display immediately.
- Teacher or coworker gift: a single stemmed flower or a mini flat sunflower clipped to a card.
- Friendship or thank-you gift, a small bouquet of three or five stems, since odd numbers tend to look more natural in an arrangement.
- Brooch or pin, a flat sunflower appliqué with a pin backing glued or sewn to the back, worn on a coat or bag.
- Hair accessory, a small sunflower sewn onto a clip or headband.
- Tote bag or backpack decoration, a flat appliqué sewn or safety-pinned onto canvas.
Because the flower itself doesn’t require sizing to a person the way clothing does, sunflowers are a low-risk handmade gift for almost anyone on a gift list.

Tips for a More Realistic Crochet Sunflower
A few small choices make a noticeable difference in how convincing the finished flower looks:
Use two shades of yellow or orange for the petals if your yarn stash allows it. Real sunflower petals aren’t a single flat color, and even a subtle shift between petals adds visual depth.
Give the center texture, not just color. The back-loop-only technique mentioned earlier, or a few scattered French knots in a slightly different brown, mimics the look of individual seeds far better than a smooth surface.
Vary petal angles slightly rather than pinning every petal at an identical angle. A small amount of natural variation, a few petals angled a touch higher or lower, reads as organic rather than uniform.
Space petals unevenly on purpose, just slightly. Perfectly even spacing can look almost too tidy; real sunflowers have some natural irregularity.
Choose a leaf green with a slight yellow undertone rather than a cool, blue-based green, since it echoes the warmth of the petals and center.
Position the stem slightly off-center relative to the flower head rather than dead center, mimicking the natural lean of a sunflower stalk toward the light.
How to Care for and Store Crochet Sunflowers
One advantage of a crochet sunflower over a real one: it can last for years with basic care.
Dusting: a soft brush (like a clean makeup brush) or a low-setting hairdryer held at a distance removes dust from petals and the textured center without flattening the stitches.
Cleaning: for washable yarn, a gentle hand wash in cool water with a mild detergent works well; reshape the petals while damp and lay flat to dry. Avoid the washing machine, which can felt or distort the stitches.
Reshaping after storage: flowers that have been packed away for a season often need a light steam and a few minutes of hand-shaping to bring the petals back to their curved position.
Storage: store flat sunflowers in a box lined with tissue paper to prevent creasing; store stemmed sunflowers upright in a container (an empty vase works well) so the petals aren’t compressed by other items.
Common Crochet Sunflower Problems and How to Fix Them
Curling petals
Usually caused by tension that’s too tight at the base of the petal, or acrylic yarn that hasn’t been blocked. Steam-block and shape the petals outward while warm; for future flowers, loosen tension slightly at the base of each petal.
Flat-looking center
Often means the center wasn’t stuffed or the increase rounds stopped too early relative to the petal layer. Add a small amount of stuffing before closing the last round, and make sure the center round count is enough to sit slightly proud of the petals rather than sinking behind them.
Uneven petals
Typically comes from inconsistent stitch counts within each petal, or rushing through petal shaping without checking each one against the last. Count stitches for the first petal, then use it as your reference for every petal that follows.
Lopsided flower
Almost always a spacing issue, petals or increases not distributed evenly around the round. Marking every few stitches with a scrap of yarn before starting petals helps keep spacing even at a glance.
Floppy stem
A stem with no internal support will bend under the weight of the flower head. Add floral wire inside the stem, or switch to a floral stick for a fully rigid option if you want the flower to stand upright without help from a vase or other stems.
Flower too small
Check your gauge against the yarn label. A hook that’s too small for the yarn weight tightens stitches more than expected. Sizing up the hook, or switching to a heavier yarn, increases the finished size.
Flower too large
The opposite issue: a hook sized too large for the yarn loosens the fabric. Try a smaller hook or a lighter-weight yarn for a more compact result.
Petals losing their shape over time
This can happen with yarn that wasn’t blocked at all, or with humid storage conditions that relax the fibers. Re-steam and reshape periodically, and store away from direct humidity when possible.
More Crochet Flower Ideas
If a sunflower isn’t quite the flower you’re picturing, there’s a wide range of other crochet flowers worth exploring, from classic crochet roses and simple daisies to fuller crochet bouquets that combine several flower types in one arrangement. Seasonal crochet flowers are also worth a look if you’re planning decor around a specific time of year rather than a single bloom.
Frequently Asked Questions
Do I need to know how to crochet in rounds to make a sunflower?
Yes. The center and often the petals are worked in continuous rounds, so it helps to be comfortable with a magic ring and basic increases before starting.
Can I make a crochet sunflower without a stem?
Yes. A flat sunflower with no stem works well as an appliqué for bags, pillows, or clothing, or as a flat decoration sewn onto another project.
What yarn works best for a realistic-looking sunflower?
A smooth, plied yarn in worsted weight tends to hold petal shapes most clearly, though DK weight can work well for smaller, more delicate flowers.
How many petals does a crochet sunflower usually have?
It varies by pattern and desired fullness, but a moderate petal count in the low-to-mid teens is common for a balanced, full-looking flower.
Can I use a crochet sunflower outdoors?
Acrylic yarn holds up reasonably well in covered outdoor spaces but isn’t ideal for direct sun or rain exposure over long periods, since prolonged UV exposure can fade the color.
How do I keep the petals from flattening in storage?
Store the flower where nothing is resting directly on the petals, and reshape with steam if they do flatten over time.
[…] How to Crochet a Sunflower for Home Decor and Gifts […]
[…] How to Crochet a Sunflower for Home Decor and Gifts […]
[…] How to Crochet a Sunflower for Home Decor and Gifts […]
[…] How to Crochet a Sunflower for Home Decor and Gifts […]